Sunday, May 29, 2016

Belated Mother's day: I've got a coffee plant!


The kids* got me a coffee plant!  I am absolutely delighted and tickled by this gift.  Now, that said, I live in Minnesota. Coffee grows near the equator, at high altitudes.  My house is also TERRIBLE for plant growing. It faces north, and the east and south sides face a steep hillside. The west side gets some sun, but mostly, it's shaded by the neighbor's trees.  

But, coffee doesn't like direct sun - rather it likes bright but indirect light. So, as long as the weather stays above 50 or so, it can live on my front porch, on my little cafe table (where I sit and drink coffee on the weekends).  And for the winter, it'll go to Chris's work, where he has a window with adequate light.  And, I really love the irony - sending my coffee plant to be cared for by my coffee-hater.

I've read that after 5-7 years, an indoor coffee plant will sometimes flower and produce enough berries to perhaps make a cup of (usually not-very-good) coffee. How cool would that be???

First things first - it can't get big enough to produce berries in the cute coffee cup the seedling was in. So I transplanted it to a pot that's got plenty of room for it to grow. I suspect it'll have to be transplanted again, to get it big enough to flower, but I'll worry about that when the time comes.  So, here it is, in its new pot:


*My stepkiddo Garrett and his wife Leah, who is a pretty awesome daughter-in-law.

Saturday, May 28, 2016

70/30 Water and tap water comparison


So, I did two brewings - one with 70/30 water, and one with regular tap water.  Instead of 26 ounces of water, I did two batches of 14 ounces each (red teapot had tap water, and brown teapot had 70/30 water).  I then ground a little more coffee than usual (nearly 6 TBS, instead of 5), and split it between the two brewers.

I brewed using my normal Duo parameters (40 seconds of bloom, add the rest of the water, wait one minute then stir, wait another minute and stir, then wait 2.5 minutes, and halt the brew cycle) in both brewers.  The Sowden Softbrew (black pot on the left) is an immersion brewing method very similar to the Duo Coffee steeper.  In both, the grounds soak in the brew water for a prescribed amount of time, and then the water either drains from the grounds, or you lift out the filter basket, removing the grounds.  There are differences in the end result between the two methods, but they are the closest I've got to the same brew method.

Anyway, one coffee was definitely better than the other, but here's the embarrassing part.  I lost track of which coffee was which.

Ah well, I'll just have to do it again tomorrow.

Friday, May 27, 2016

70/30 Water for coffee. That's parts per million.


Hey, take a look at this:

It's a recipe for water that's supposed to be good for brewing coffee:  Water containing 70 parts per million of bicarbonate, and 30 parts per million of magnesium sulfate. 70/30 water.  

Now, I'm blessed with tapwater that's pretty good for coffee, despite being very, very, VERY hard.  As in, off the scales of my hot tub test strips hard.  Somewhere over 250 parts per million hard (the test strips stop at about 250 ppm), and that's AFTER the water softener does its job.  (I know the instant it is out of salt, because my dishwasher starts sprinkling powdered chalk all over my clean dishes).

So, for years, I've wondered if distilled water would be good for brewing coffee. Distilled water is "thirsty," because it's a better solvent than hard water.  Then I came across the above URL and I knew I had to try it.

Because you are working with such tiny quantities (as in 1/100ths of a gram), you have to make solutions first.  Twelve grams of magnesium sulfate (Epsom salts) dissolved into 1000 ml of distilled water, and 14 grams of baking soda dissolved in 1000 ml of distilled water, and you have the solutions needed to make 70/30 water.  Once you have that, you add one teaspoon of each solution to 1000 ml of distilled water. 

That's pretty soft.  We'll see if I like it.

Also, after using 2 liters of water out of the gallon of distilled water, I wondered how many liters a gallon holds.  I used a unit conversion app on my phone to find out... but then I saw this:

3.78 liters in a gallon
That's right. After removing 2 liters, I still had 1.78 liters.  I actually poured it into a measuring container - yep. The company producing that gallon really measured quite precisely, and really did have 1.78 liters left over.  I pretended it was 1.75 for math purposes.    That jug now has 1.75 teaspoons of each of the solutions in it. And tomorrow, it's becoming coffee.

Oh, and what's with the expiration date. Distilled water expires???

Thursday, May 26, 2016

Storage: Experiments in storing coffee


I decided to try a methodical coffee storage experiment. I'm using 5 different kinds of storage containers (plus one extra as a control), each with 33 grams (the exact amount I use each day to make coffee for Kivi and myself) of VERY fresh coffee, that was roasted yesterday (I wanted coffee roasted today, but I'll do that in the next iteration of this experiment).

See the code on the sticker?
YYWWD (2016, week 21, Day 2 (Tues)
Here's what I did:  I got 4 each of 5 different kinds of storage, and packed the coffee in 33-gram increments in each. I'll open the first batch after one week, two weeks, three weeks, and four weeks, to see how well they keep the coffee fresh over time.

Very fresh coffee is still outgassing CO2 from the roasting, so the air-tight containers should pressurize, and the ones with valves should allow it to escape.  Anyway, here are the containers:

Container 1: 3-ounce glass spice jars with a metal screw-on lid. They held 33 grams of coffee beans easily, with only little headspace. http://www.containerstore.com/s/kitchen/spice-storage/3-oz.-glass-spice-bottle/12d?productId=10013579
I got the ones with a metal lid. There is no rubber seal, so hopefully they are airtight.
***

Container 2: 3-ounce acrylic spice jars with a bale-top and silicone or rubber seal.  These barely held 33 grams of coffee (I had to hold the lid closed, shake the jar slightly so that coffee would work its way into the recessed lid, then latch it closed). http://www.containerstore.com/s/kitchen/spice-storage/acrylic-spice-jar/12d?productId=10011992


***

Container 3: 4.25 oz/125 ml Fido bale-top canning jar with a rubber seal. These held 33 grams of coffee easily, with more headspace than I'd like.  Fidos are well-liked in the home-fermenting world, because they allow CO2 to escape when pressure builds high enough, without letting any air back in (i.e. if air was allowed back in, mold would grow on the surface of the ferment, and that rarely happens with the Fidos).  http://www.amazon.com/125-Terrine-Hermetic-Canning-Storage/dp/B00DH08GRE (we got a better price than what is shown here - shop around).
***

Container 4: Prepara Evak Mini containers - they shrink down to the surface of the coffee, and allow CO2 to escape. They also have a valve that prevents air from getting back in.  33 grams filled them about 1/2 way or thereabouts. They are very well-liked among coffee enthusiasts.  http://www.amazon.com/dp/B00UMXUG54/

***

Container 5: One quart Waring Pro vacuum bags (ignore the asparagus - it was a much better picture than of an empty bag).  Don't bother with the Ziploc or Freshsaver versions of these bags. You'll be lucky to get a second use out of them. The Waring Pro bags will last 20+ uses, if handled gently.  I used two bags for each week: one I intend to remove accumulated CO2 as it ougasses, revacuuming every day or so until the outgassing stops, the other I'll leave puffed up.  In my current storage methods, I remove the excess CO2.  http://www.amazon.com/Waring-PVS1000CGB-1-Gallon-Pistol-Reusable/dp/B009O9VI86/


My intent is to do a cupping each week, to see how the beans survived the storage methods over time. My daughter will mix the samples (assign a code to each), so that when I evaluate the taste of the coffee made from the beans, I will not know which sample is which. I'll take notes on my findings, but will not look at the results until all four weeks are complete.  

I intend to repeat the experiment every month for 4-5 months, using the same coffee each time. Each month I will vary the time past roasting.  This month, the coffee is roast+1 (i.e, I packed the samples one day after roasting).  Hopefully next month I'll test roast+0.  This should measure the effect of the CO2 outgassing (40% of the CO2 is lost in the first 24 hours) on storage.  Eventually, I intend to attempt (somehow) to add CO2 to the beans if they are older, to prevent the beans from being packed with any O2. But, we'll see.


The coffee came from Peace Coffee, a fairly large Twin Cities roaster. They are big enough that I'll be able to get this same coffee month after month (though they cannot guarantee that it will come from the same batch of green beans, but I can't control for everything), but small enough that they have the flexibility to work with someone like me who only wants 2 pounds of coffee, and think my geekiness is totally cool.  Only drawback is that their roastery is only open 8am-4pm Monday-Friday (in other words, during working hours, 50 minutes from my home).

Update: The next morning, I got more bags, and vacuum-packed four more samples, and froze them. In the past, I'd decided that freezing beans made them taste funny, but due to recommendations from someone online, I decided to throw freezing into the mix.  


Wednesday, May 25, 2016

Raising a coffee-drinker, part 1

My daughter Kivi loves coffee. Loves it.  And has since she was ... 9 months old.

No, I didn't feed my infant coffee. Well, I did, but only a little, and only because it was a surprise, and she was damned insistent.

I was at my cousin's house, sitting on the floor, and my baby was sitting on my thigh, as if it were a bench. My cousin Sam made me a latte, and handed the mug down to me.

Kivi immediately stood up, holding my shoulder (she wasn't walking yet) to steady herself, and reached for my mug, snatching at it.  Fearing my baby would pull the drink onto herself and get burned, I transferred it to my other hand.  She immediately turned in my arms, and started snatching at it again.

Not knowing what else to do, I transferred it back. Same thing.  So, I said, "Ok, ok ... I'll give you a taste!"  She immediately plopped back down on my leg, and opened wide.

Like a baby bird.

I dipped my finger into the coffee, so that a droplet of milky coffee clung to the tip of my finger, and placed it on her tongue. She closed her mouth, and I swear I'm not making this up - swished the coffee around on her tongue.  It wasn't particularly sweet - I like my lattes only barely sweetened, but that didn't seem to matter.

Then she opened her mouth, nice and wide.  She didn't speak, but it couldn't have been more clear. "More! More!"

I continued placing drops of coffee into her mouth, and she happily tasted it. After about a dozen drops or so, I said, "Kivi, you are a baby. You've had enough!"  And she crawled away.

You think babies can't understand you, just because they don't talk yet? Think again. They understand you perfectly.


Tuesday, May 24, 2016

Coffee Shop Review: Kopplins


This place is definitely a custom coffee shop. They have many fewer offerings, no flavor shots that I saw, and the brewed coffee (that they brewed for me) was quite good.  Kivi's latte was also yummy (and she actually guzzled it, which seemed like kind of a shame).  Also tasted both the house hot chocolate, and their specialty hot chocolate, and both were unusually good, though surprisingly not very sweet. I like my chocolate less sweet, and even I would have preferred it slightly sweeter than it was.  Their pastries were also much higher quality than many places.

They are also situated right near Izzy's Ice Cream Parlor, so we all had mini ice-cream cones too (the scoop was the size of a small melon-ball). Not the healthiest of diets for the day, but definitely fun.

Because there are several little restaurants in row, lots of people sat outside, enjoying both coffee and ice cream - the weather was good, and the mood was friendly.

I do have to share a photo of their gear for sale:


I was delighted to see the Duo Coffee Steeper (to the right of the big coffee maker in the center) for sale, along with the Stagg kettle!  First time I've seen either in the wild.  

Monday, May 23, 2016

Wednesday, May 18, 2016

Kickstarter: Simpli Press

Backed this today:  https://www.kickstarter.com/projects/simplijenni/simplipress/description


Cleanup is wildly easier, and it results in a much cleaner cup. I backed them, and they funded within an hour. I suspect that they'll have doubled their funding goal within 24 hours.

Making a fresh cuppa


I've spent the last several years trying to figure out how to keep my coffee beans fresh for longer than about a week.  I love trying different coffees from all over the world, but until recently, I was only able to enjoy them for the first week, and after that, I was stuck drinking bitter, stale, mediocre brew until I ran out.

I'm a compulsive researcher, and Google yielded the same information over and over again: Coffee's enemies are heat, light, moisture, and oxygen.

Heat and light are not something I need to worry about - My house never gets very hot, and my beans are stored inside an internal cabinet (in other words, the cabinet is not built against an external wall), so they are kept in the dark, except when I'm making coffee.

Moisure? Well, I do live in the midwest, in the land of 10,000 lakes, no less (Minnesota actually has 11,842 lakes bigger than 10 acres in size).  It is very humid here. However, I think that if I manage to control the O2 exposure, that humidity will also be taken care of (with some exceptions - freezing or refrigerating beans causes condensation on the beans themselves unless you take some extra precautions).

The first thing I learned is to buy whole beans.  I figured this one out on my own - I bought some La Minita beans from Caribou Coffee, and brewed an AMAZING cup of coffee. Then my second cup the next day was pretty good.  Day three yielded a barely drinkable cup, and from then on, it was bitter and ... not really drinkable.  The beans, which I had had ground in the store had gone stale.

Once again, I turned to the internet: ground coffee keeps for a far shorter time than whole beans, because it increases the bean's surface area, and exposes more of the coffee oils to air.  Ground coffee's shelf life is about a day.  Whole beans in an airtight container last closer to a week. The key is to grind right before brewing.

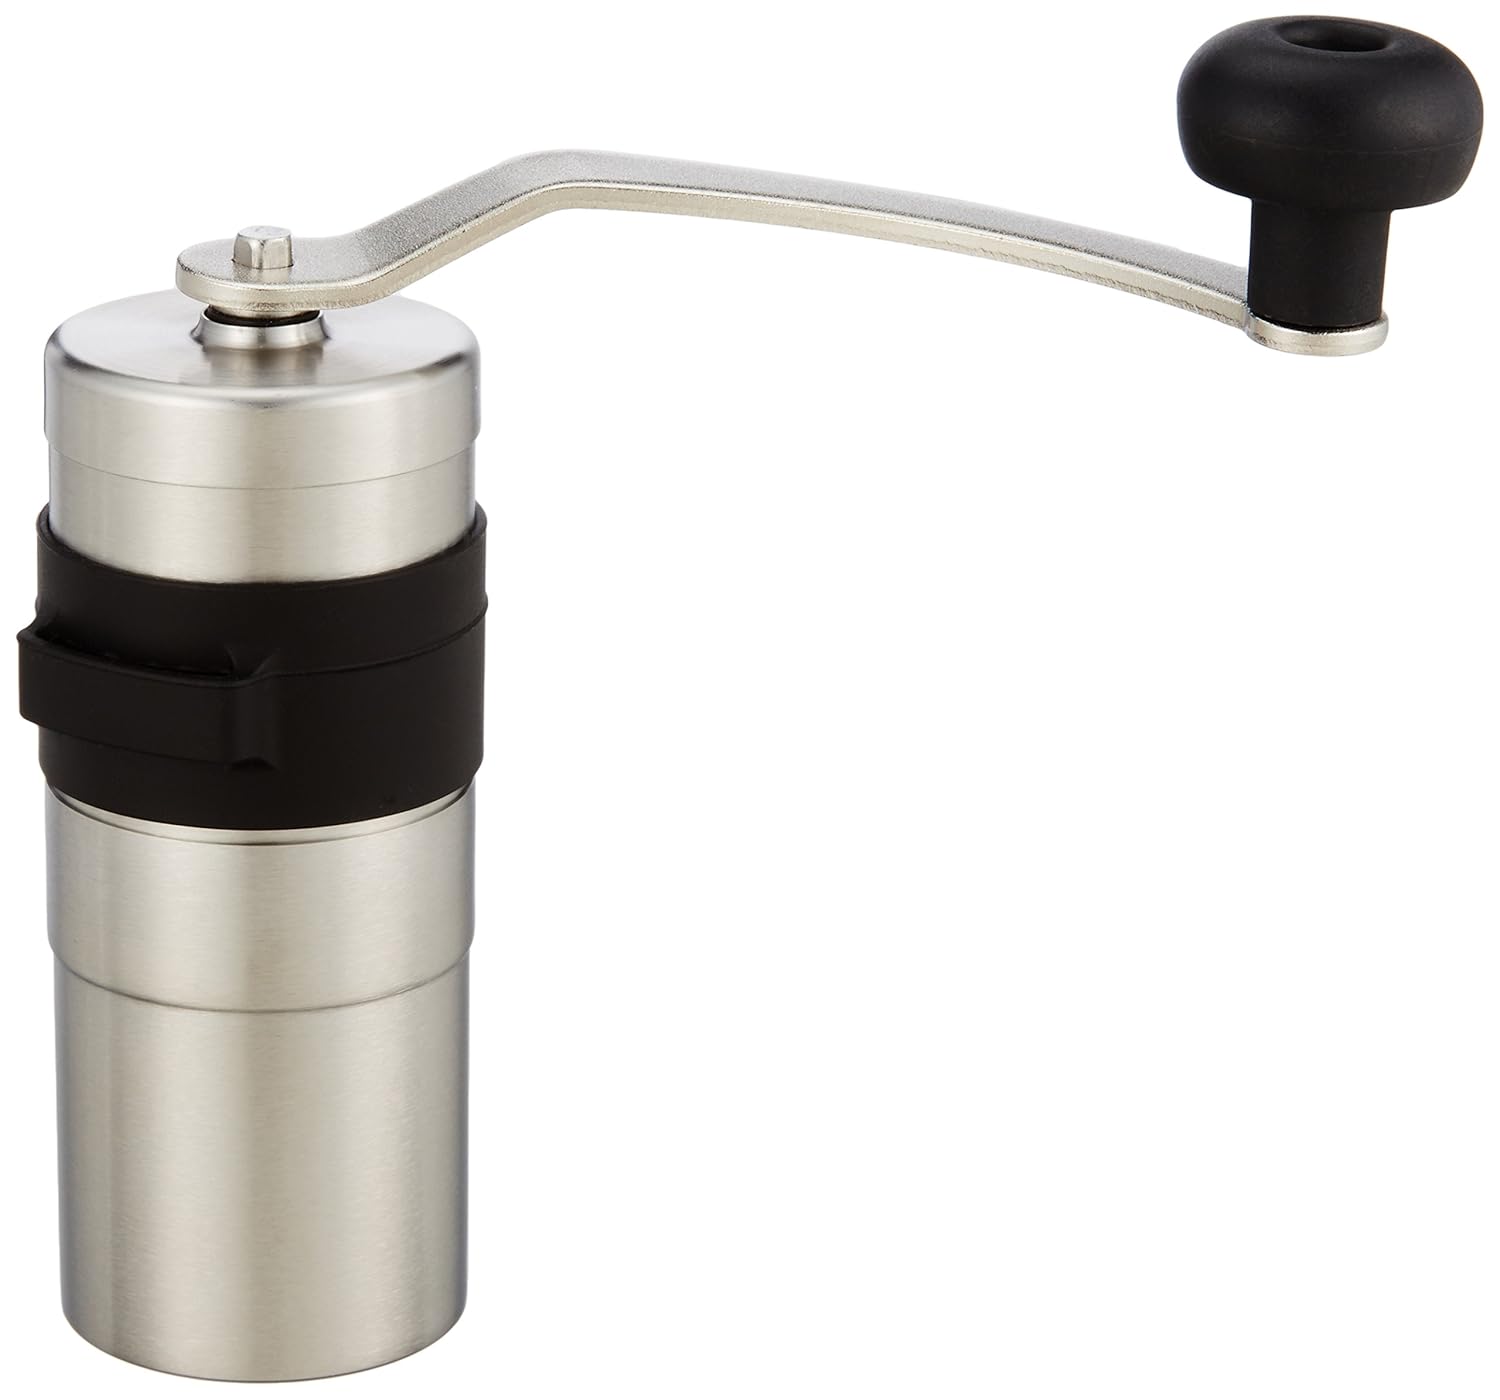
So.... I bought a grinder (a Kyocera), and began buying whole beans.  And that helped enormously.  I started out grinding enough beans for my morning cup at home and for my work cup several hours later, and just carried the grounds with me to work.  But I noticed that my work cup wasn't nearly so good.  So I bought a second grinder (Hario Mini Slim), and started grinding beans right before brewing, at work, too.

This was the number one thing I did to improve the longevity of my beans.  My coffee stayed good an entire week instead of a day or two, from this step alone.

Next, I turned my experiments to storage, and refrigeration.

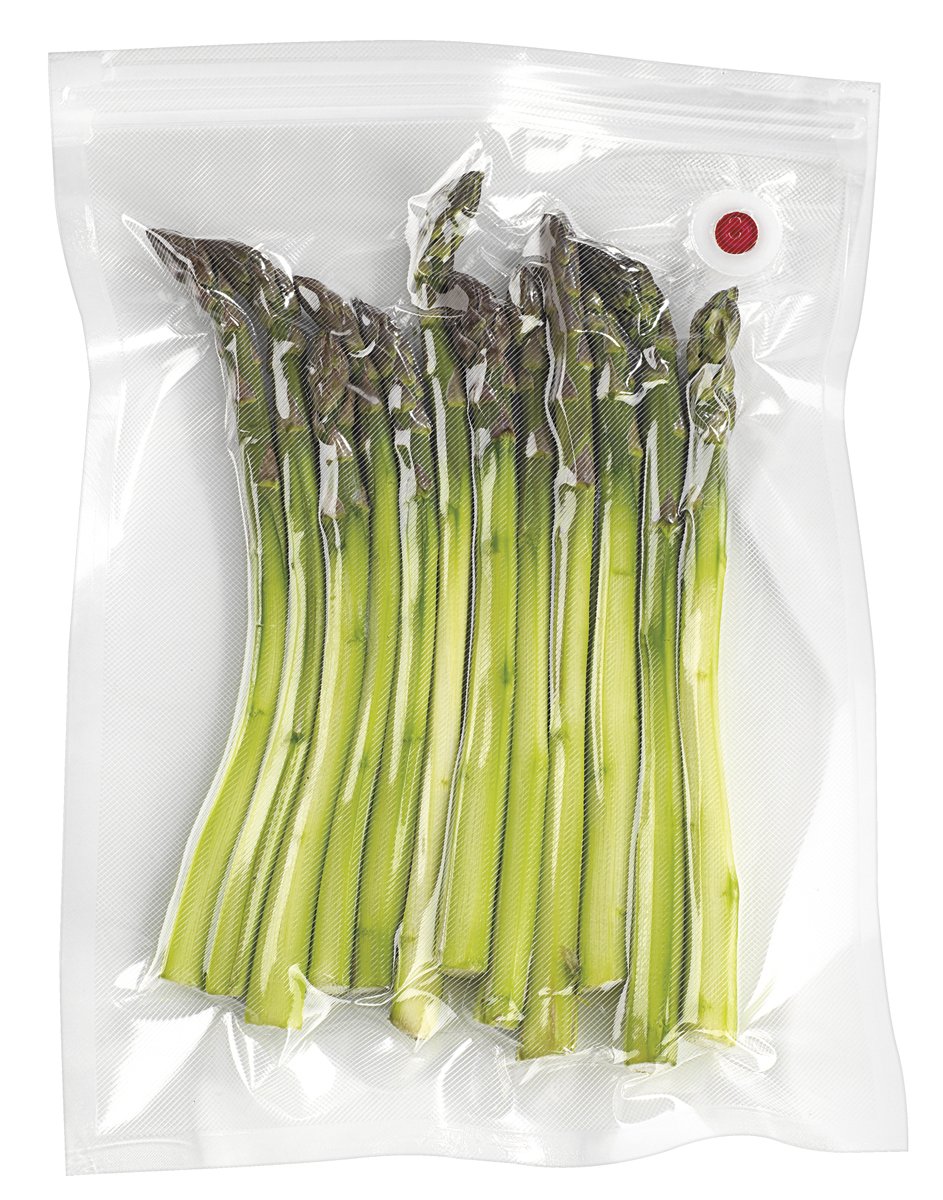
Initially, I tried something called a VacuVin coffee storage container. I love the brand for other things (like wine), but was unimpressed with their coffee storage. First, it didn't seem to prolong the freshness of my coffee.  I mean, it's certainly better than nothing, but I didn't find the VacuVin to be better than just leaving the beans in the original valved bags, with a rubber band to keep the air out.  And they were unreliable, required a lot of maintenance, and you never knew when it would fail to hold a vacuum.

While I was playing with the VacuVin, I experimented with and/or researched the refrigerator and the freezer. I had kept my coffee beans in the fridge when I was in college, and when I was working at a school in an area a LONG way from the teacher's lounge, I brought in a mini fridge and a coffee maker, and kept my beans in the fridge, then too.  But I didn't find that it helped then, so I didn't bother with it this time around.  My research suggested that fridge causes beans to go off FASTER - the refrigerator is a very humid place, the dried beans absorb flavors from your food, and the frequent going in and out of the cold causes condensation on the beans themselves.

I did play with the freezer some, with mixed results.  Condensation is still a problem, just as it is with the fridge.  But I found taking the following steps made the freezer a viable solution, when there is just no other choice:

  • Don't take your beans in and out of the freezer. They should go in once, and come out once, never to go back in.  Repeated moves invites condensation on the beans. Freeze them in smallish portions (like a week's worth), and once they come out, store at room temperature.
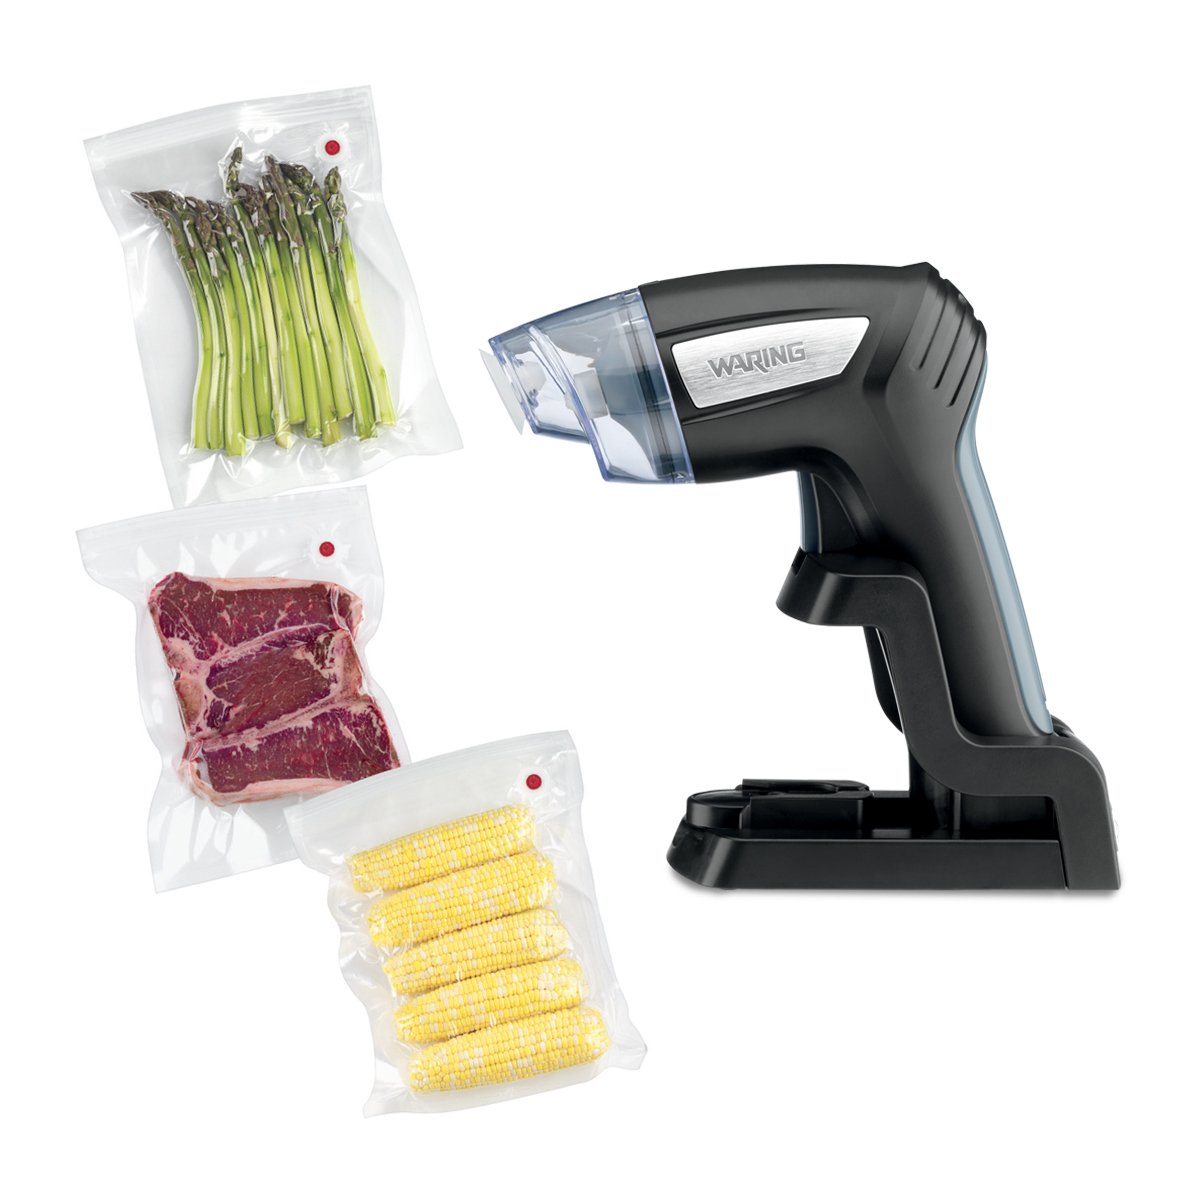
  • Wrap/pack them VERY well (vacuum-sealed is good).  
  • Wait until the beans have come up to room temp before opening the package. This prevents the condensation issue. 
(Note: Some espresso-makers like to freeze their beans in 1-serving increments, and grind them right out of the freezer - this is totally fine, as condensation on the beans immediately before brewing simply doesn't matter).

The freezer does change the flavor though, and not for the better in my opinion.  So, I believe that the cold does damage the oils, but it's better than letting a large quantity of beans go to waste.
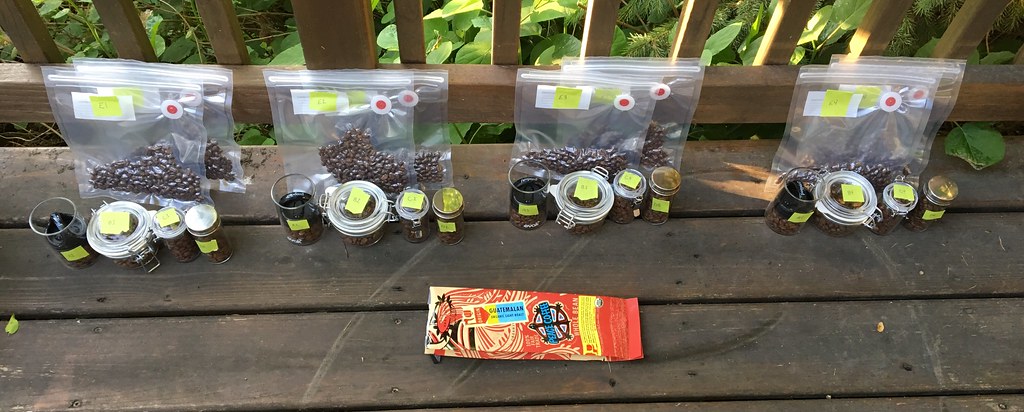
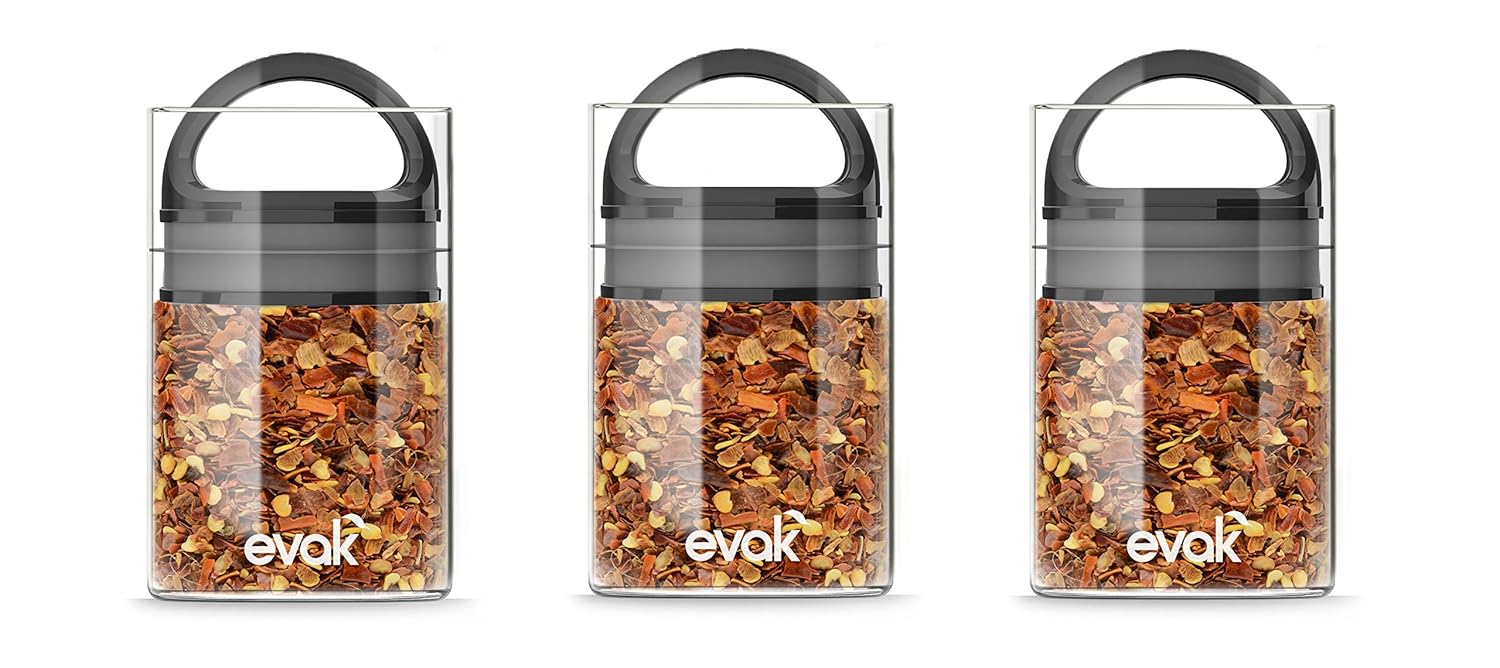
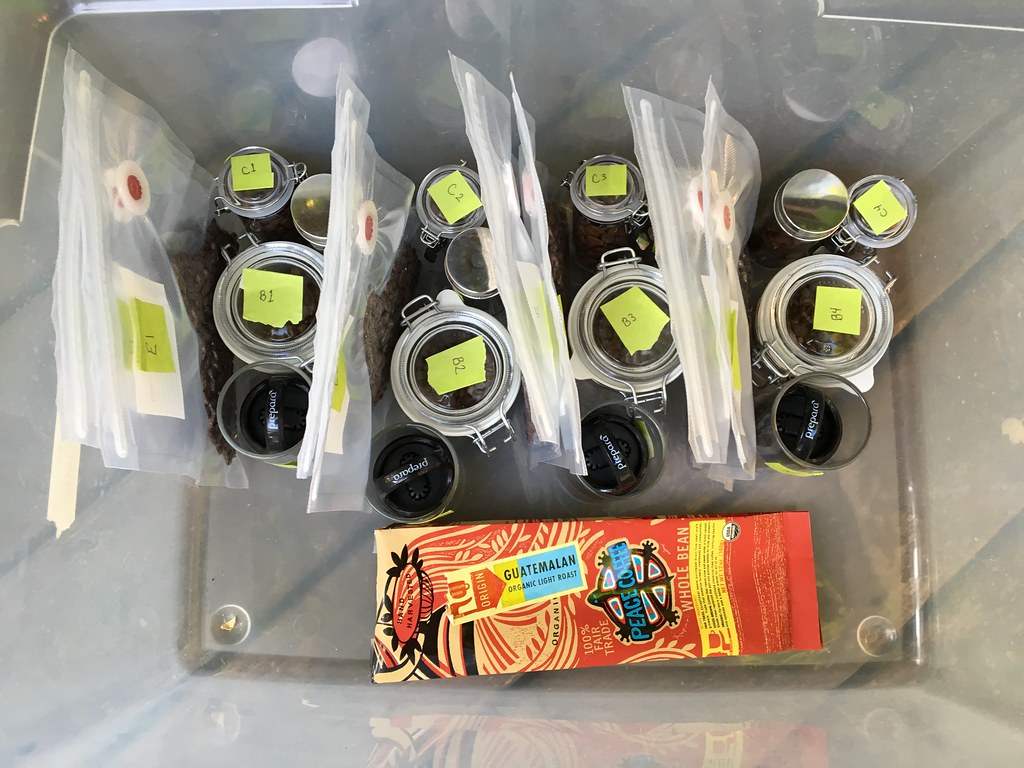
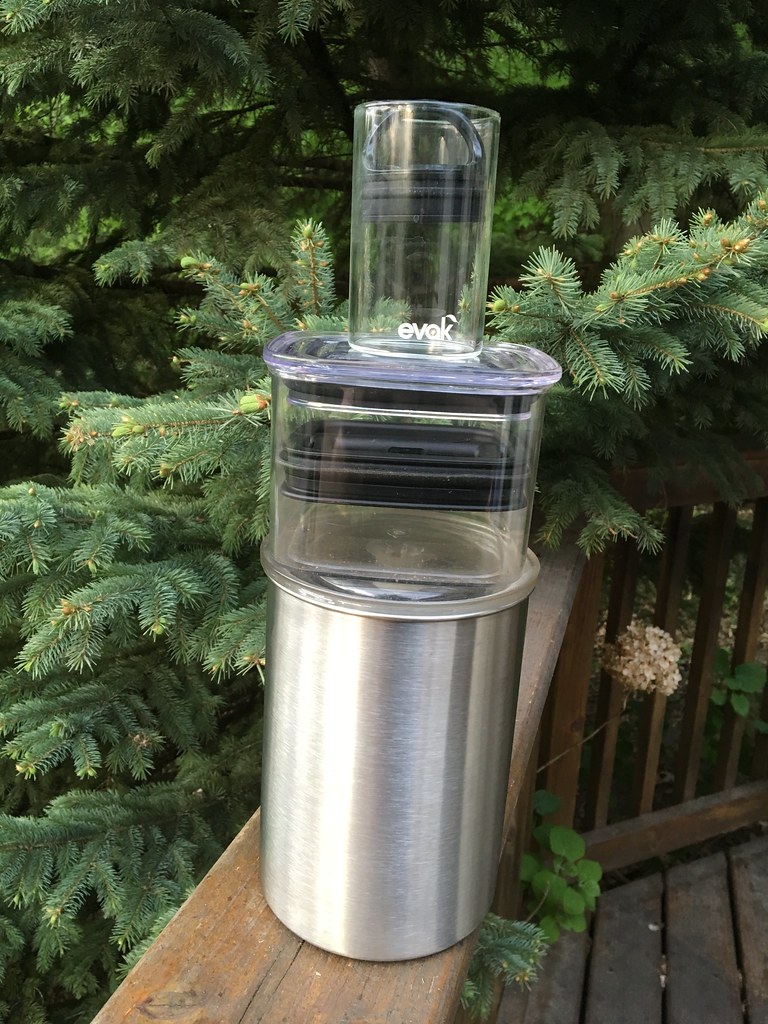
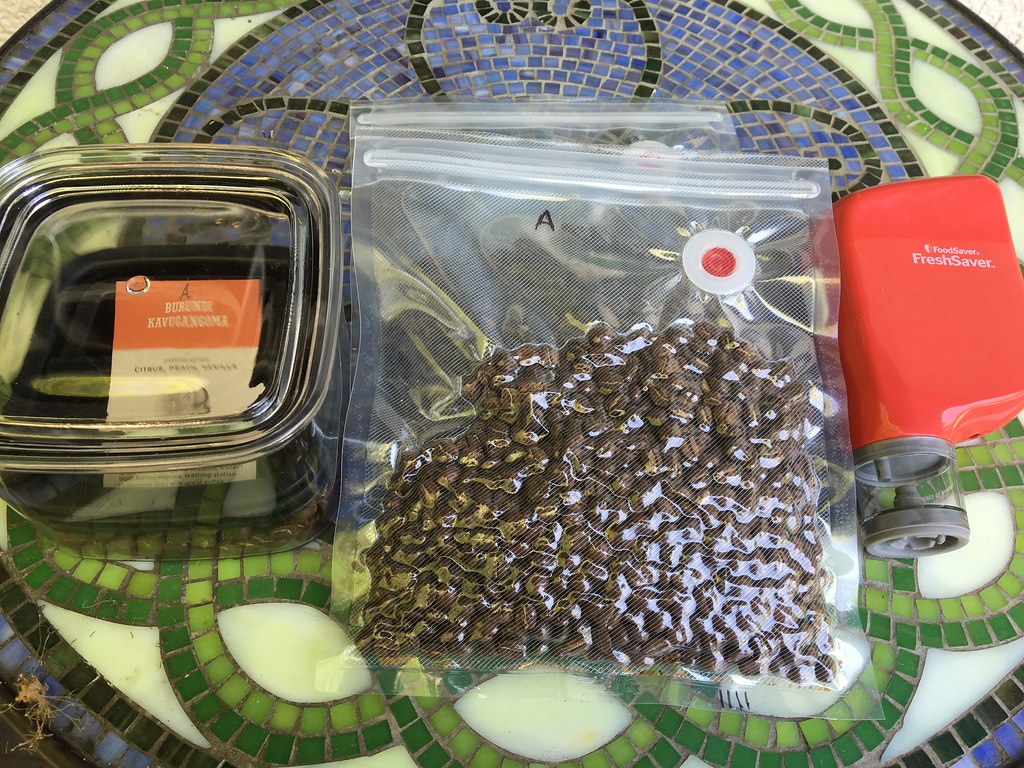
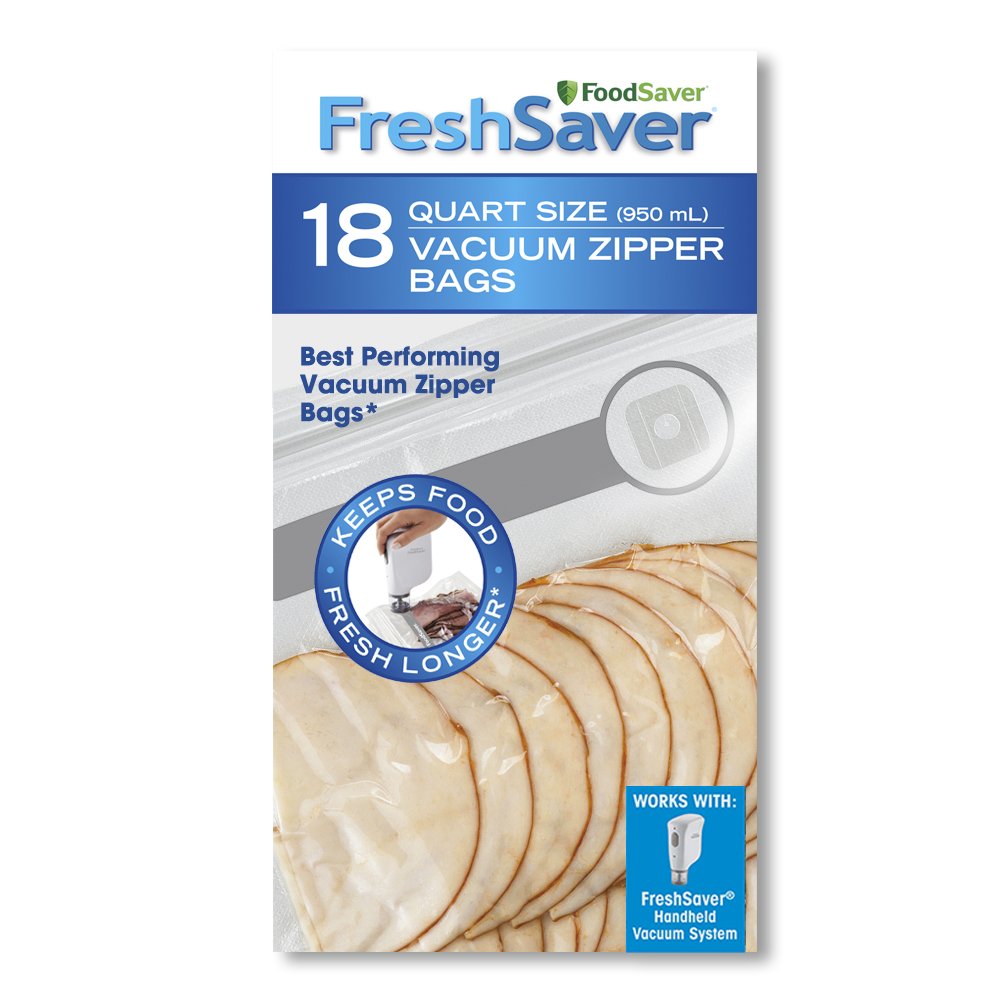
Next I tried the Airscape canisters, and eventually the Prepara EVAKs, which are basically the same, and they are equipped with a lid with a one-way valve that slides inside the canister, collapsing with the coffee as it gets used up.  Definitely better than a mason jar, or a crock or a tupperware, which still trap air inside them.  But it wasn't until I started using the Airscapes for just that week's worth of coffee, and vacuum sealing the rest that I started to see real results.

Now, all this is only necessary, if you don't use up your beans as quickly as others. I know people who drink so much coffee, that they don't bother to store it carefully - they just drink it before it can go stale. And that's certainly a viable strategy.  But for the rest of us, who don't have as good access to fresh beans, and want to buy it in bigger quantities, buy whole beans, grind right before you brew, and store the beans away from light, heat, oxygen, and moisture.

Sunday, May 15, 2016

Decent article on keeping coffee beans fresh

I'm always looking for ways to keep beans fresh.  Decent article.

http://www.theatlantic.com/health/archive/2010/10/the-coffee-storage-conundrum-how-to-keep-beans-fresh/64118/

Friday, May 13, 2016

Coffee Shop Review: Sovereign Grounds


Visited Sovereign Grounds on Sunday with. Nice way to spend Mother's Day.  This is an interesting place to visit - it's a kid-friendly coffee shop - with some toys in one of the dining rooms. Decor is great. Food is pretty good (thought the brownie wasn't chocolatey enough). They even had some gluten-free foods.  

It's a cafe-style shop - they've got a full range of espresso-drinks (and the latte was quite good), but no brewed coffee to order. The coffee I had from a thermal carafe was only OK.  I was disappointed as they blend and roast their own beans, and I would have enjoyed tasting a fresh cup made from one of them.    I probably should have picked some out to take home - but I've got a LOT of coffee right now - no room for more.  

It's a decent place  if I lived nearby, I think I'd get coffee from them regularly, but it's not so good that it's worth the 45-minute drive to get it.

Thursday, May 12, 2016

Coffee Shop Review: The Buzz Coffee and Cafe


Visited the Buzz on Saturday.  It's definitely a cafe-style shop. Coffee was decent (though they don't brew to order). Espresso drink (Kivi insisted on a shot of vanilla) was decent.  I liked some of the artwork for sale.  Decor was good.

But ... the place smelled overwhelmingly of rancid grease.  It's hard to enjoy a location, when all you can think of (instead of the delightful coffee aromas) is that they really should change out the oil in the fryer more often.

The barista did show me the coffee label. :-)


Wednesday, May 11, 2016

Coffee Storage Review: Airscape and Evak canisters

Top to bottom:
Prepara Evak mini (glass), Airscape Lite (plastic), Airscape original (stainless steel)
There's a new kind of coffee storage, that is reliable, keeps the beans fresh, and is totally convenient.  I don't know what the "class" of storage is called, or even if it even has a name, but I'll call it the "collapsing-lid canister."

Basically, they are an airtight vessel with a lid that slides down inside the canister, and rests on the surface of the coffee, thereby shrinking the size of the vessel to always fit - exactly - the amount of coffee you actually have. Think about it - regular airtight containers trap both air and food inside. Which will keep your food fresher, a container filled very full, or an almost empty one?  It's the equivalent of sucking all the air out of a ziplock bag.

The canisters are more complicated than that. The lids have a one-way valve built into them, that allows the air to escape as you collapse the lid into the vessel. It also allows any gasses released by the beans to escape as well, but doesn't allow air back in. It doesn't create a vacuum.

Airscape was the first on the scene, I think.  The original canisters were made of stainless steel, which is great for folks who store their coffee out on a counter, as they are genuinely light-tight.  The inner lid has a hinged handle - when it's upright, the valve is open, and allows air to escape as you push the lid down until it touches the surface of the coffee. Then you rock the handle sideways so it lays flat against the inner lid.  Handy if you need to fill the canister very full.  It has an outer lid for additional freshness. The first generation had a second 1-way valve on the outer lid, but newer ones do not.  Not sure the valved outer lid was necessary or not, or why they chose to eliminate it.

They now have a "Lite" version, which is made of plastic. I use these the most - I like seeing the beans through the plastic, and as much as I avoid brewing in plastic, storage of room-temperature beans in plastic isn't a problem for me. Plus, they come in a square version, and it fits in my coffee-storage bin better (to help contain the smell for my coffee-hater).  Airscape does offer a glass version, now as well, though I imagine they work just as well.  I prefer the Airscapes, because I store the coffee label between the collapsing lid and the outer lid. Especially cool, is that Airscape also offers a big version of their collapsing lid for use inside buckets, not that that is especially helpful for coffee. :-)

The Prepara Evaks only come in glass (so far as I know), and the lids meant for coffee are lined with stainless, so that only inert materials touch coffee (they do have plastic parts above the layer of stainless, however). The Evak collapsing lid handle doesn't lay flat though, which means if the canister is very full, the handle will stick up out the top. My favorites of these are the minis, which are GREAT for taking a day or perhaps two of beans with you for traveling. No outer lid, though. I doubt the outer lid is necessary for freshness, but I like it as a convenient place to store my coffee label. If you have your coffee lined up on a shelf, you can still set the label above the collapsing lid. It's just that my Evak gets stored sideways inside a plastic bin (it's tall and thin, rather than short and squat like the Airscapes), and the label falls out. Not in itself a big deal, except that I'm sloppy about putting away my old coffee labels from inside the bottom of my coffee bin, so if it falls out, I might forget which label is the correct one (well, probably not. I just like the additional lid, even if I doubt it's necessary for bean freshness).  The Evaks also offer long-handled scoops that hook over the top edge. These are handy if you get the especially tall/thin versions of their canisters.

The canisters from both companies (but not the collapsing lid) are dishwasher safe. The collapsing lids should only be wiped clean.

If you go through coffee quickly - these might not be necessary, as they really only offer modest improvements over a jar or ceramic crock for bean storage.  And they are expensive ($10 for the Evak mini, $20-$25 for bigger sizes).  But every bit helps in my opinion.

Recommended.


Tuesday, May 10, 2016

Coffee Shop vs. Coffee Shop

So, what is a coffee shop?

Is it an establishment that provides coffee, atmosphere, and food? Or is it a place that provides food, atmosphere, and coffee?

I think coffee shops can be divided into two categories: ones that emphasize food and atmosphere and serve espresso drinks and pre-brewed coffee, and ones that emphasize the coffee, but also happen to serve espresso and espresso drinks, might or might not have much in the way of food, and are of course, nice places to gather.

So how to differentiate?  They both are great places to sit and sip coffee. They both serve espresso, enjoyable lattes, cappuccinos, and Americanos.  They both (usually) sell beans.  They both have varying amounts of yummy things to eat.

They both serve coffee.  But one brews individual cups of coffee to serve, and the other has only big thermal carafes of pre-brewed coffee.

I think I'll call them by these names: custom coffee shop and cafe coffee shop.  Yeah, I know "cafe" means coffee, but to many of us, it means "little informal restaurant," and that's how I'm using it here.

I visited two cafe coffee shops this previous weekend.  One was pretty good, and serves their own roasts, and their latte was good, but their thermal carafe of coffee was merely OK.  The other smelled like rancid grease, and despite the coffee being decent, that pretty much killed the experience for me.
I like most coffee shops, regardless of style. A place to sit and sip and talk is always appreciated. But there's nothing quite like a freshly-brewed cup of coffee made just for me.  And while I'm not generally an espresso-drinker, I think the custom coffee shops tend to serve better espresso, too.  So, I definitely prefer the custom coffee shops.

Does that make me a coffee-snob? Probably.  But I'm OK with that.

Monday, May 9, 2016

Morning People in Columbia/Colombia

Columbia? Nah. Colombia? Maybe.


This one made me laugh. Because I lived in Columbia, Missouri when I was in grad school, and it's really quite true - not enough coffee in that town to make ME into a morning person. But the country of Colombia? There might be enough (but probably not)

Friday, May 6, 2016

Gear Hack: Labeling coffee for storage

Left: Airscape with coffee label, marked with a letter.
Center: bags marked with same letter.
So, ever since I started breaking my coffee into 3 ounce/85 gram batches, and storing just one batch in the Airscape, and the rest in vacuum-sealed bags, my coffee stays fresher MUCH longer.

But, labeling was a total hassle - I got tired of writing the coffee type on the bag, and I could only really use the top third of the bag, because if I wrote over where the beans are, it was difficult to read. (Seriously - black ink over brown beans. I don't mean difficult, I mean nearly impossible).  I keep 3-4 different coffees at a time, so I might have up to 8 vacuum-sealed bags of beans going at once (rarely more than that).

So, I cut out the label from the coffee's original bag itself with the name of the coffee on it, and write a letter on the label (A-F as those are the first 6 letters of the alphabet, and I've never had more than 6 coffees at once).  Next, I put 85 grams of coffee into the Airscape, and put the label between the inner lid and out lid.  Finally I take the corresponding-lettered bags out of storage, and put 85 grams of coffee into each bag.  Now, I never have to write on the bags at all. I do put a tiny hash mark on the bottom, each time I put coffee into a bag, to track how many re-uses I get out of the bag (with the Waring Pro bags, I get well over 20 reuses before the bag becomes unreliable). Notice the letter A on the vacuum bag in the picture? And if you look reeeallllyyy carefully at the business card in the top of the airscape canister, at the very top, in the orange band, there is a letter A.

Anyway, the take away, is that I never have to write the name of the coffee, anywhere. And it's quicker and simpler.

Thursday, May 5, 2016

Coffee Storage Review: Vacuum sealing bags

L-R: Airscape, Warring Pro bags, Freshsaver Handpump


After switching my coffee storage from the VacuVins to the Airscape cannisters, I was STILL not satisfied with the freshness of my coffee.

And it's not so much that I was dissatisfied with the Airscapes - they ARE better by a longshot than the VacuVins. Both the Airscapes, made by Planetary Design, and the very similar Prepara EVAK containers work far better than a regular crock, jar, or any air-tight storage container, especially if you don't consume a jar's worth of beans in 3 or 4 days.  The lid slides down inside the container, shrinking the size of the container with the decreasing amounts of coffee, thereby helping to limit exposure to O2. And they are FAR more convenient in day-to-day use than the VacuVins.

But, the air filling the spaces between the beans is still there.  And every time you brew coffee, the canisters must by necessity be opened and closed, which allows even more air and humidity to get to the beans, even if it's for a short time.  So the Airscapes as the sole method of storage, only caused modest improvements in how long my coffee stayed fresh.

On the other hand, the Airscapes used in combination with vacuum-sealing the beans, helped enormously. So now, I store ONLY the amount of coffee I'll use within the next few days the Airscapes. That's only about 3 ounces (85 grams) of coffee, so I use the smallest size containers. Using this method, my coffee stays in pretty good shape for a full month.

I vacuum pack the rest of the beans in 3-ounce/85 gram increments.

I don't use the big, Foodsaver-type vacuum-sealers, as I don't like the amount of plastic waste, plus I find the big units inconvenient, cumbersome, and a pain to store.

Instead, I bought 3 kinds of resealable vacuum-storage bags to test. Basically they are Ziploc-type bags with a vacuum-sealing valve in one corner. You use a hand-held vacuum pump to remove the air, after you sealed the bag seal across the top.

The results:

Ziploc: These are completely unreliable, and basically single-use bags, as they wouldn't stay in a tightly-vacuumed brick. I was only rarely able to get a second use out of the bags, even avoiding both hand washing or dishwasher cleaning. Not a green choice at all, since you couldn't re-use them, and even though they are cheapest per bag, they end up being the most expensive option. ($0.45/bag and $0.45/use). I'm glad I have the little hand-pump though - it's handy. Bags NOT recommended.


Freshsaver: These have the same kind of valve as the Ziplocs, and are a little better - I was usually able to get 2 or occasionally 3 uses before they stopped holding a seal.  But, even though they they are more expensive per bag, they end up being less expensive on a per-use basis. ($0.69/bag or $0.28/use at 2.5 uses). NOT recommended.

Waring Pro: These are MUCH more expensive, have a different kind of valve, and are made of a much heavier-duty plastic.  They are also very reliable, if you don't put them in the dishwasher, and either don't wash them, or only wipe them down and let them dry. I've gotten 20+ uses out of them (I tossed that batch, not because they had gotten unreliable, but because I'd run out of writing space on the outside of the bag, and wanted to start over with a different, simpler labeling system). I've read that it's not unusual to get more than 50 uses ($0.80/bag). But because I've not gotten any bags to 50 uses (yet), lets use the more conservative 30 uses to calculate the per use cost: ($0.03 per use, but it could be much cheaper than that). RECOMMENDED.

A note about the vacuum pumps.  All three kinds of pumps: the hand pump that Ziploc provides, and the hand-held battery/electric pumps that Freshsaver/Waring provide work on all three kinds of bags, even though the valve on the Waring Pro is different.  It can be a little fiddly to use the Ziploc/Freshsaver pumps on the Waring bags, but really not bad.  I decided against the Waring Pro pistol grip pump for several reasons: 
  1. At the time, it was about $75, more than 3 times more expensive than the next cheaper option.
  2. It can't be used while it was plugged in.
  3. The battery died MUCH too quickly according to many, many reviews. So, once the battery died, the unit was rendered useless (because it can't be used while it's plugged in), and the battery isn't easily replaceable.
  4. The Freshsaver pump was less than $20, and COULD be used while plugged in.  
Note: if you use either the Freshsaver pump or the Ziploc pump (I have both), and you find that you have trouble getting a good seal against the valve, wipe the rubber gasket around the mouth of pump with a damp dishcloth, to remove any grit/dust that has collected on it, as it prevents the pump from sealing around the valve.


Wednesday, May 4, 2016

Grinder Review: Porlex Mini Stainless Steel Coffee Grinder

This is my fourth grind - got it in August of 2014, to keep at work (it replaced the Hario Mini that I sent to a friend).  This thing is exactly like the bigger Porlex, but shorter (and has a black silicone band), so the review will sound familiar.

Pros:
  • Like the Hario Mini, this is small enough to grind directly into an Aeropress.
  • Fits nicely in your hand, but this thing is TINY. It holds no more than about 2 TBSP of beans, and really is meant to make a single cup.  
  • Nice crank arm length.
  • Black silicone band includes a little loop to hold the handle when it's not in use, but I found it a hassle.
  • Outer body is all stainless steel, making it a durable choice for travel or everyday use.
  • Easy-to-adjust grind mechanism (see below) - you twist a little clicky bolt on the bottom of the top chamber.  
  • Slightly better-than-average grind consistency

Cons:
  • Crank arm flies off for some people, though I never found it a problem.
  • Like many small grinders, it is a little awkward to grind with it. It's short body makes it more awkward than the bigger Porlex.
  • No way to "remember" your settings for different grinds, other than by counting clicks. Not a big deal if you don't plan to adjust it.
  • Only slightly-better-than average grind consistency, and given it's price point ($35-$65 depending on the direction the wind is blowing, but usually around $45 or $50), I'd really like it to be better. 

This is my current work grinder, except that since I'm currently working from home, it's sitting unused in a box of office supplies.  

It really is a great little grinder (with an emphasis on little).

Oh, and Amazon carries some replacement parts.


Tuesday, May 3, 2016

Brewer Review: Duo Coffee Steeper

Back in January of 2014, I backed a Kickstarter for a new coffee brewer called the Duo. Here's their Kickstarter video:


I was SOLD. It was supposed to be ready to ship in July of 2014. I backed it immediately.  

I quickly became obvious they weren't going to meet their timeline (seriously, does any Kickstarter??).  But, I really didn't mind, as these guys were GREAT about keeping the backers updated with what was going on, and what changes they had to make, that sort of thing. It was like they took the backers along with them on the experience.  

But... I was tired of waiting on trying an immersion brewing method, so I procured a Sowdon Softbrew, and used it during the year I waited on the Duo. Definitely sold on immersion brews.

July of 2015 came, and it finally arrived.  

I quickly brewed some coffee, using the same parameters I had worked out for the Sowdon. Coarse grind (like for a French press), a hefty bloom time with just a tad of water wetting the grounds, and about 4.5 minutes of brew time, with a couple of (gentle) stirs to get the grounds to sink into the water.  

I'm not sure why, but the Duo made better coffee than the Sowdon, which had been my favorite coffee-brewing method.  I still don't know why as they are essentially the same method. But it is better.

It seems complicated at first - all these parts to assemble. But once I got used to it, it takes me about 15 seconds to get it ready for brewing. I don't like the lid very well (it's plastic, and the only plastic that touches coffee). And sometimes coffee burbles out the spout when it drains. But that's it. My only negatives - totally worth it for such good coffee.

We gave a Duo to my father-in-law for his birthday last August thinking that he'd enjoy playing with a new brewer, but not expecting that it would displace his beloved French press.  Much to our surprise (and delight), it's become his daily brewer - it's easier to clean up than a press, and yields a cleaner cup, but with equal flavor.

It's now May of 2015, and I've been using the Duo nearly every day for 9 months, and it is STILL my favorite brew method.  

Here's my recipe/brew instructions:

  1. Grind: 5 tablespoons of fresh coffee beans, and place in the Duo filter basket. 
  2. Heat: 24 ounces of water to about 200 degrees.   
  3. Bloom: Barely wet the ground and wait 40 seconds.
  4. Pour: Fill the brewer to the top of the filter backs and wait 1 minute.
  5. Stir 1: Gently press the floating grounds into the water with the back of a spoon, and wait 1 minute.
  6. Stir 2: Gently press the floating grounds into the water with the back of a spoon, and wait 2.5 minutes.
  7. Drain: release the coffee into the lower reservoir, and enjoy your coffee.

You can get one here.